Code Reader 改名为 Sources,已经上架http://itunes.apple.com/app/id1125732186。 https://github.com/vulgur/Sources。
这篇讲讲 Repo 的文件列表的页面。
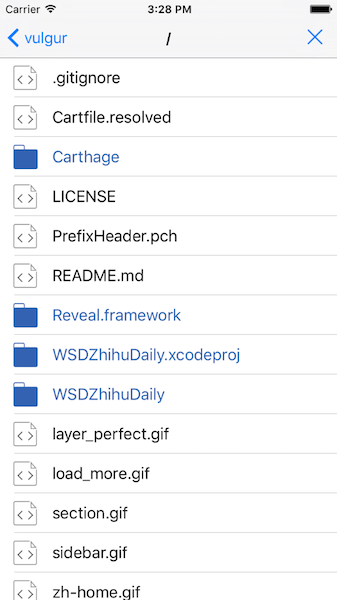
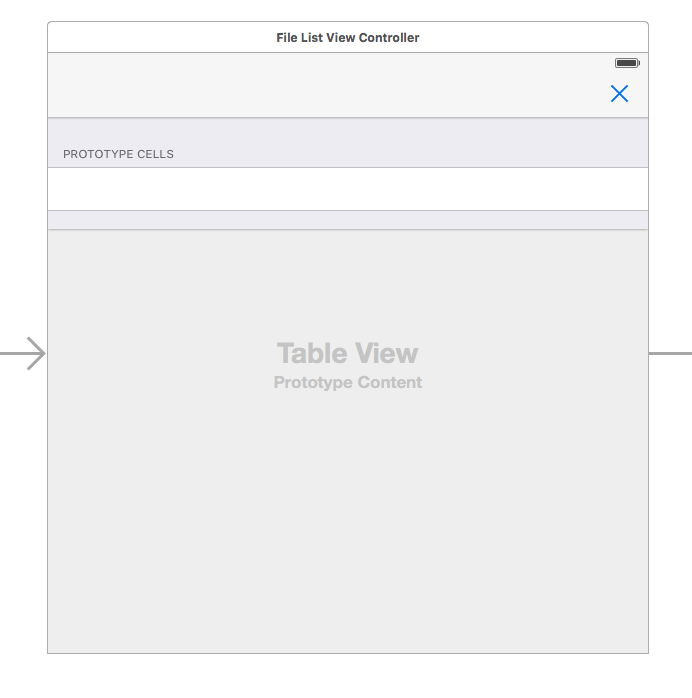
View 这个页面就是一个简单的 UITableView,所以在 Storyboard 中就选择了 Table View Controller。每一个 Cell 就是一个文件(或目录),点击目录的话进入子目录的文件列表页面,点击文件的话就进入代码页面。
File Cell 也是自定义的,布局十分简单,就是左面是图标,右面是文件名,这里就不贴图和代码了。
Model 每个 Cell 对应的 model 就是 RepoFile,这是根据 Github API 定义的类。
RepoFile 1 2 3 4 5 6 7 8 9 10 11 12 13 14 15 16 17 18 19 20 21 22 23 import ObjectMapperclass RepoFile : Mappable var name: String? var type: String? var path: String? var downloadURLString: String? var htmlURLString: String? var apiURLString: String? required init ?(_ map : Map ) { } func mapping (map : Map) name <- map ["name" ] type <- map ["type" ] path <- map ["path" ] downloadURLString <- map ["download_url" ] htmlURLString <- map ["html_url" ] apiURLString <- map ["url" ] } }
这个类在以后的 blog 中还会用到,而且还需要改动,这里的代码是只满足本篇的版本。
Controller 负责 model 和 view 背后工作的就是 FileListViewController。
获取文件列表数据 这个 controller 有一个属性 apiURLString,是由 UINavigationController 中上一级的 controller 传入的,每个文件列表就是根据这个字符串通过 Github API 来获取文件数据的。
Fetch file list 1 2 3 4 5 6 7 8 9 10 11 12 13 14 15 16 func fetchFileList (path: String) EZLoadingActivity .show("loading files" , disableUI: true ) Alamofire .request(.GET , path) .responseJSON { (response) in switch response.result{ case .Success : if let items = Mapper <RepoFile >().mapArray(response.result.value) { self .fileList = items self .tableView.reloadData() } case .Failure (let error): print (error) } EZLoadingActivity .hide() } }
显示文件和目录 RepoFile 有一个属性是 type,代表文件的类型,file 或 dir。在配置 cell 的时候,根据这个属性来设置 cell 的样式。
Cell configuration 1 2 3 4 5 6 7 8 9 10 11 12 13 override func tableView (tableView: UITableView, cellForRowAtIndexPath indexPath: NSIndexPath) UITableViewCell { let cell = tableView.dequeueReusableCellWithIdentifier("FileCell" , forIndexPath: indexPath) as ! FileCell let file = fileList[indexPath.row] if file.type == "dir" { cell.filenameLabel.textColor = UIColor (red: 51 /255 , green: 98 /255 , blue: 178 /255 , alpha: 1 ) cell.fileIconImageView.image = UIImage (named: "dir" ) } else { cell.fileIconImageView.image = UIImage (named: "file" ) } cell.filenameLabel.text = file.name return cell }
根据文件类型选择不同的操作 前面说了,要区分对不同文件类型的点击操作。点击 file 文件就很简单,直接跳转到展示代码的页面,这个下一篇 blog 会讲。点击 dir 文件就要 push 一个 FileListViewController,这里需要用从 UIStoryboard 中新建,而不能直接初始化 FileListViewController,因为一来直接初始化得来的实例没有右上角那个 Bar Button Item,二来这个实例也没有 storyboard 中建立的那些 segue。
Select file or dir 1 2 3 4 5 6 7 8 9 10 11 12 13 14 15 16 17 18 19 20 21 22 23 24 25 26 27 override func tableView (tableView: UITableView, didSelectRowAtIndexPath indexPath: NSIndexPath) let file = fileList[indexPath.row] if file.type == "dir" { let nextFileListVC = UIStoryboard (name: "Main" , bundle: nil ).instantiateViewControllerWithIdentifier("FileListViewController" ) as ! FileListViewController nextFileListVC.apiURLString = file.apiURLString if pathTitle == "/" { nextFileListVC.pathTitle = self .pathTitle + file.name! } else { nextFileListVC.pathTitle = self .pathTitle + "/" + file.name! } navigationController?.pushViewController(nextFileListVC, animated: true ) } else if file.type == "file" { performSegueWithIdentifier("ShowCode" , sender: file) } } override func prepareForSegue (segue: UIStoryboardSegue, sender: AnyObject?) if segue.identifier == "ShowCode" { let codeVC = segue.destinationViewController as ! CodeViewController let file = sender as ! RepoFile RecentsManager .sharedManager.addRecentFile(file) codeVC.filename = file.name codeVC.downloadAPI = file.downloadURLString } }
返回到 Repo 页面 终于讲到这个功能,这是我灵机一动想出来的,觉得还是十分实用的。RepoViewController 就可以。
Pop to repo page 1 2 3 4 5 6 7 @IBAction func backToRoot (sender: UIBarButtonItem) if let repoVC = navigationController?.viewControllers[1 ] { navigationController?.popToViewController(repoVC, animated: true ) } else { navigationController?.popToRootViewControllerAnimated(true ) } }
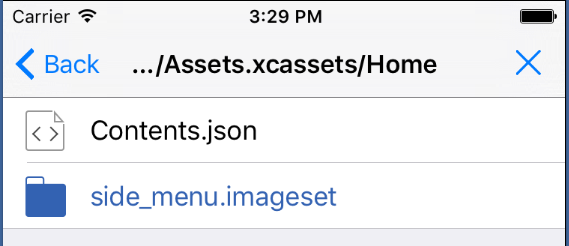
优化路径显示 导航栏的标题显示的是当前目录的路径,但是如果路径太长的话(很常见)iOS 就会截断这个字符串,导致信息不完整。
所以我做了两个小事情:
优化返回按钮的 title。如果当前页面是根目录,这个 title 显示的是 repo 的名字;如果是第二级目录,则显示 “/”;其他子目录就显示父目录的名字。
导航栏的标题在长度允许的情况下,显示完整路径,否则只显示父目录和本目录,父目录以上的路径用“…”代替。
Nav configuration 1 2 3 4 5 6 7 8 9 10 11 12 13 func configNavigationTitle () let pathComponents = self .pathTitle.componentsSeparatedByString("/" ) let currentPath = pathComponents[pathComponents.count -1 ] let parentPath = pathComponents[pathComponents.count -2 ] navigationItem.backBarButtonItem = UIBarButtonItem (title: currentPath == "" ? "/" : currentPath, style: UIBarButtonItemStyle .Plain , target: nil , action: nil ) if pathTitle.characters.count > 30 { navigationItem.title = ".../" + parentPath + "/" + currentPath } else { navigationItem.title = pathTitle } }


